Create Your Own Photo Booth Online Free: Step-by-Step Guide
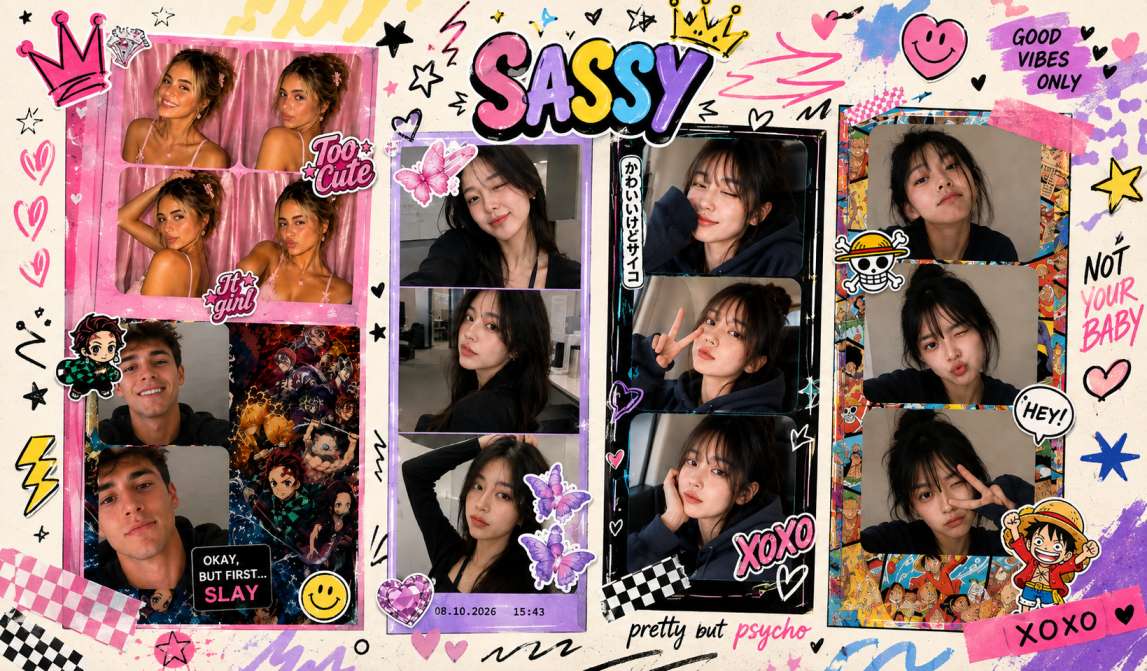
Renting a photo booth for a wedding or office party usually means a rental fee, a delivery window, and someone babysitting a machine in the corner. Create Your Own Photo Booth skips all of that — you design your own photo booth online, publish it as a link and QR code, and your guests take strips from their own phones. No booth to rent, no app for anyone to download, and it's free from start to finish.
This guide walks through exactly how to create your own photo booth online, step by step, plus what your guests actually see when they open the link — and where it works best, from weddings to office parties to birthdays.
Quick answer: Go to boothexperiences.com/create-photo-booth, pick a strip layout, style the frame and effects, then hit Save & Publish. You'll get a live boothexperiences.com/s/ link and QR code to share with guests — free, no signup, ready in under 2 minutes.
Why a DIY Online Photo Booth Beats Renting One
- No equipment to set up or break down. Everything runs in each guest's own browser — there's no machine to deliver, plug in, or babysit.
- No rental fee. Traditional photo booth rentals commonly run several hundred dollars or more per event. Creating and publishing your own is free.
- No queue for one machine. Every guest with the link uses it from their own phone at the same time — nobody waits in line.
- Works anywhere. A backyard, a conference room, a hallway outside the reception — if there's a phone and a signal, there's a photo booth.
- You control the look. Frame color, texture, filter, shape, and even a stamp with your names or logo — set once, applied to every strip.
What "Create Your Own Photo Booth" Actually Gives You
No account or login is required — a creation is tied to your device, not a username and password. The whole flow is free: designing it, publishing it, and guests actually using it to download their strips.
Start at boothexperiences.com/create-photo-booth and click "Let's start." That opens a short guided wizard with four tabs. Every tab shows a live preview of the strip as you change settings, and you can jump back and forth between tabs freely — nothing you've set gets lost.
How to Create Your Own Photo Booth Online, Step by Step
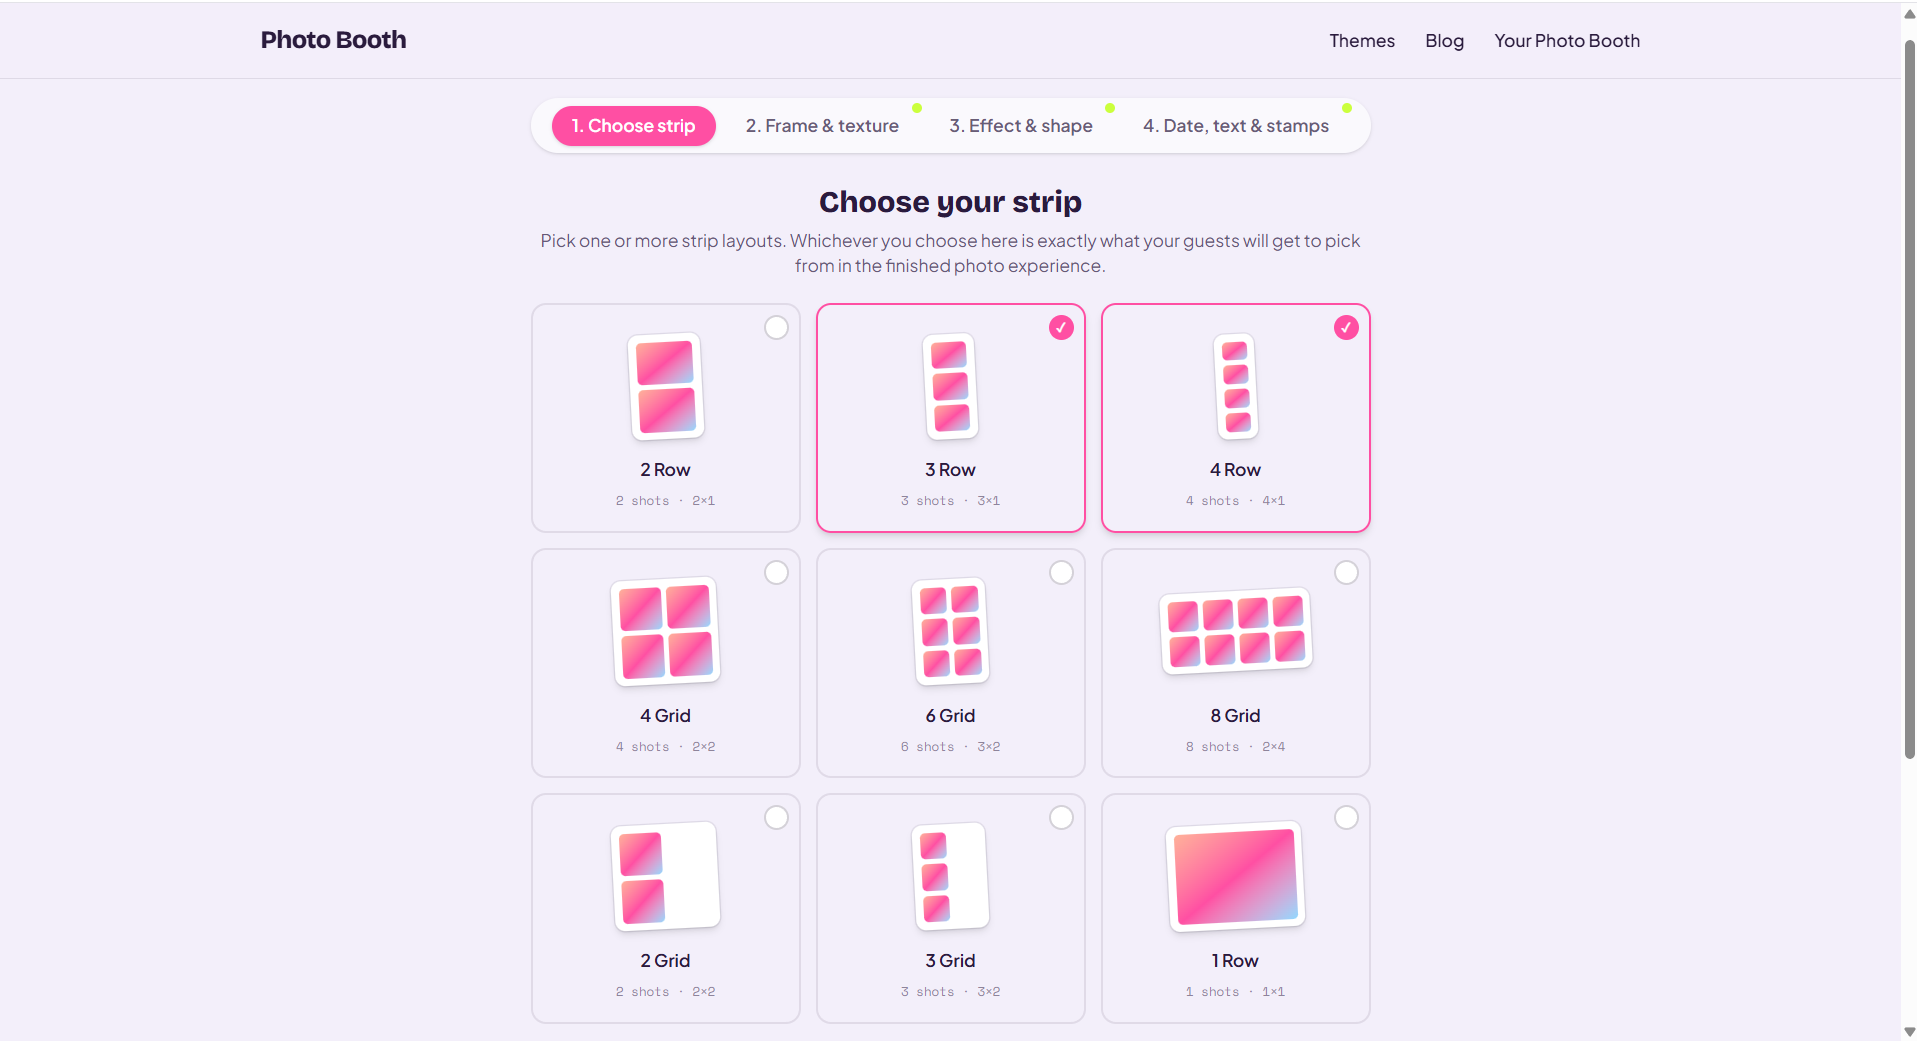
Step 1: Choose Your Strip Layout
Pick from 9 layouts: 1, 2, 3, or 4 Row classic strips; 4, 6, or 8 Grid tile layouts; and 2 or 3 Grid layouts, which show the chosen frame color or texture through the empty cells for a more decorative look. Each layout card shows a mini preview, its shot count, and its grid arrangement (e.g. "4 shots · 2×2").
You can select more than one layout — guests will get to pick which one they want when they open the link, exactly like the layout picker in any pre-built theme. If you only select one, guests skip that step entirely and go straight to taking photos.
Step 2: Set Your Frame Color and Texture
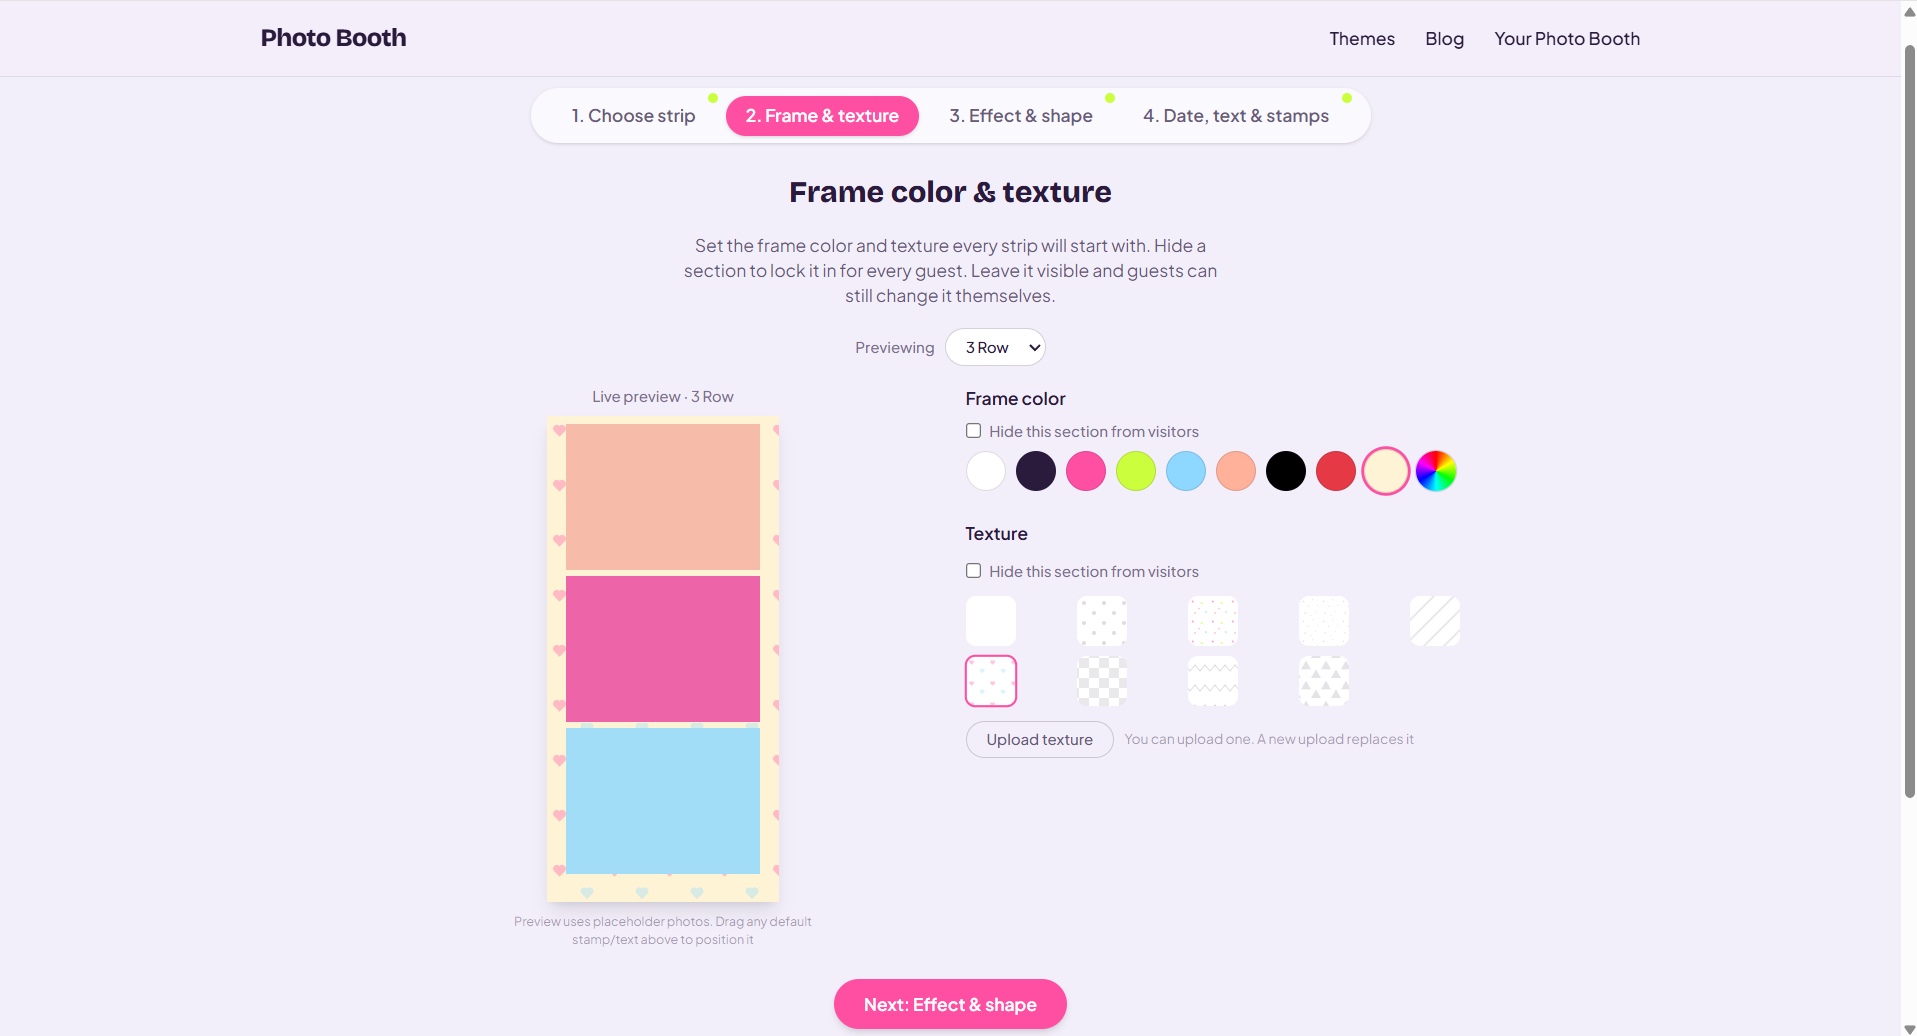
Choose from 9 built-in frame colors or open the freeform color wheel to match any hex code — handy for wedding colors or a brand palette. Add a texture the same way: 9 built-in repeating patterns, or upload your own image and fine-tune its size, spacing, position, and rotation.
If you'd rather lock the look down, hide either section entirely so every guest strip uses your exact color and texture, with no option for guests to change it.
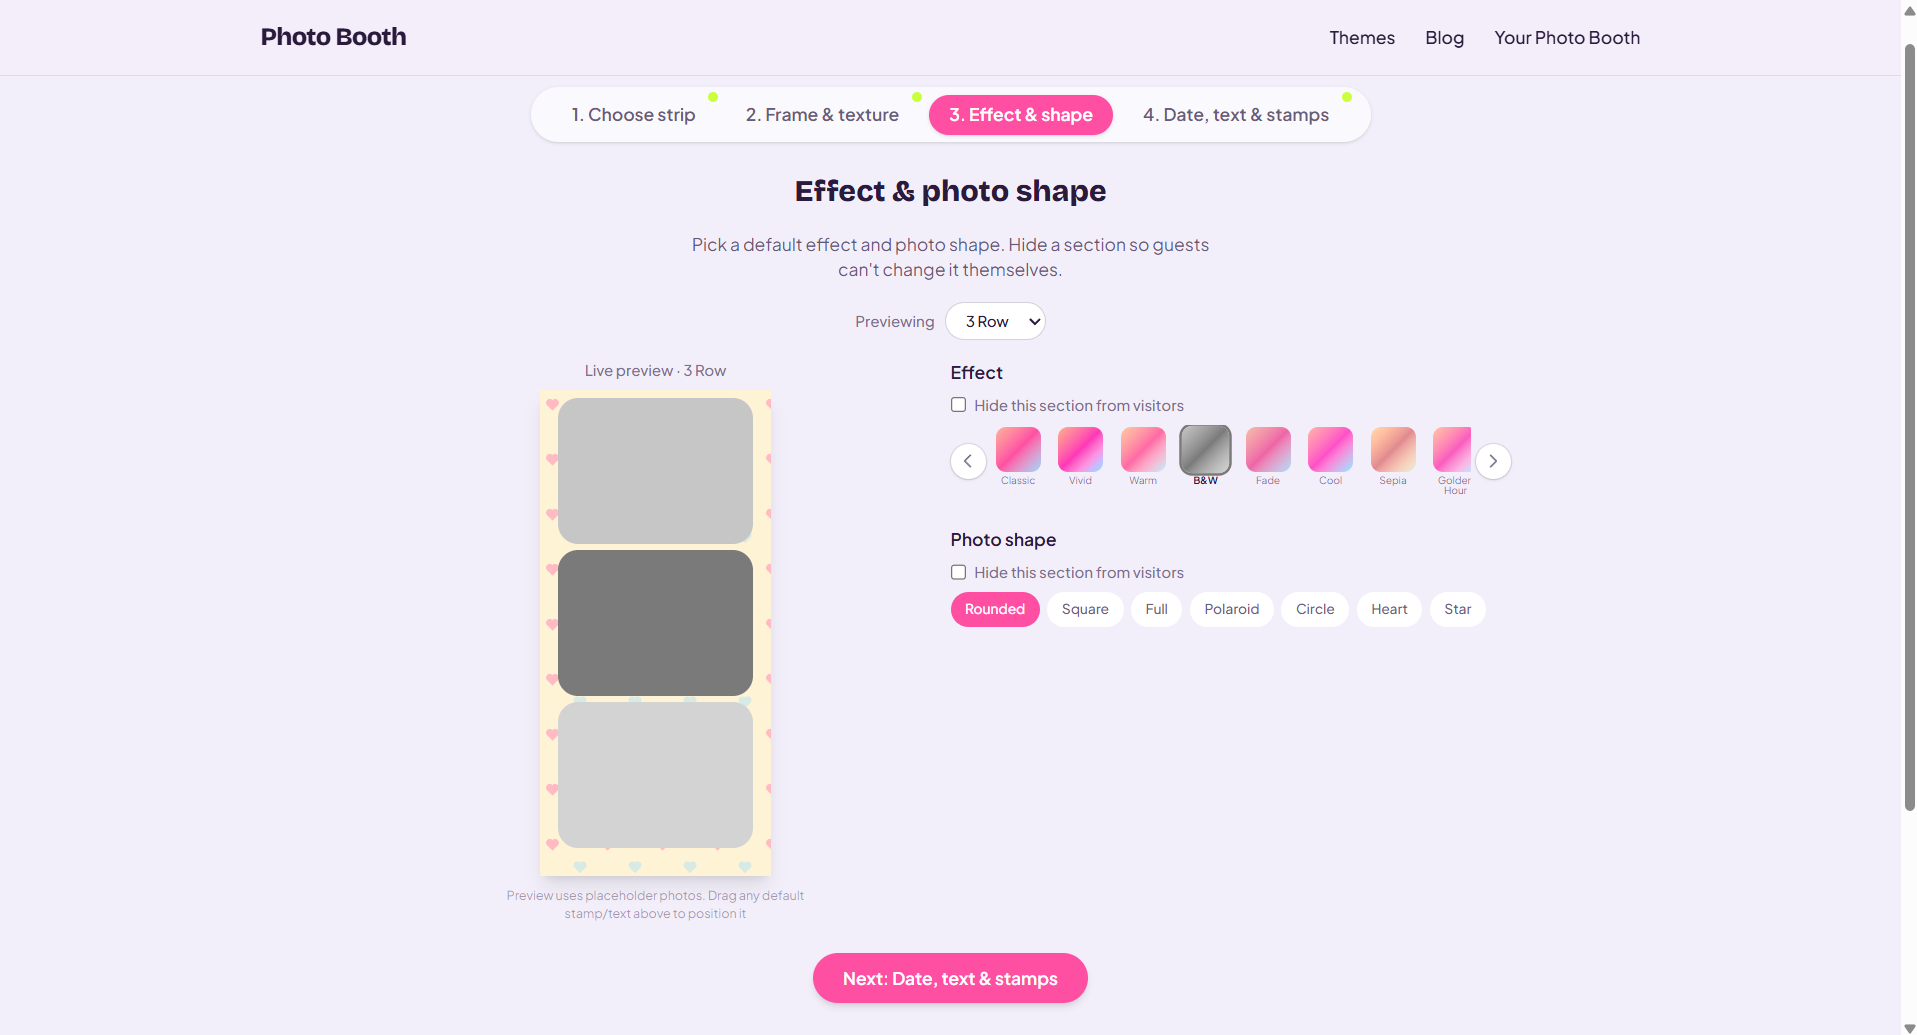
Step 3: Pick a Filter and Photo Shape
Apply one of 9 filters — Classic, Vivid, Warm, Black & White, Fade, Cool, Sepia, Golden Hour, or Dramatic — to just the photo area (the frame, texture, stamps, and text stay untouched). Then choose a photo shape from 7 options: Rounded, Square, Full-bleed, Polaroid, Circle, Heart, or Star. Both sections can be hidden to lock the choice for guests, too.
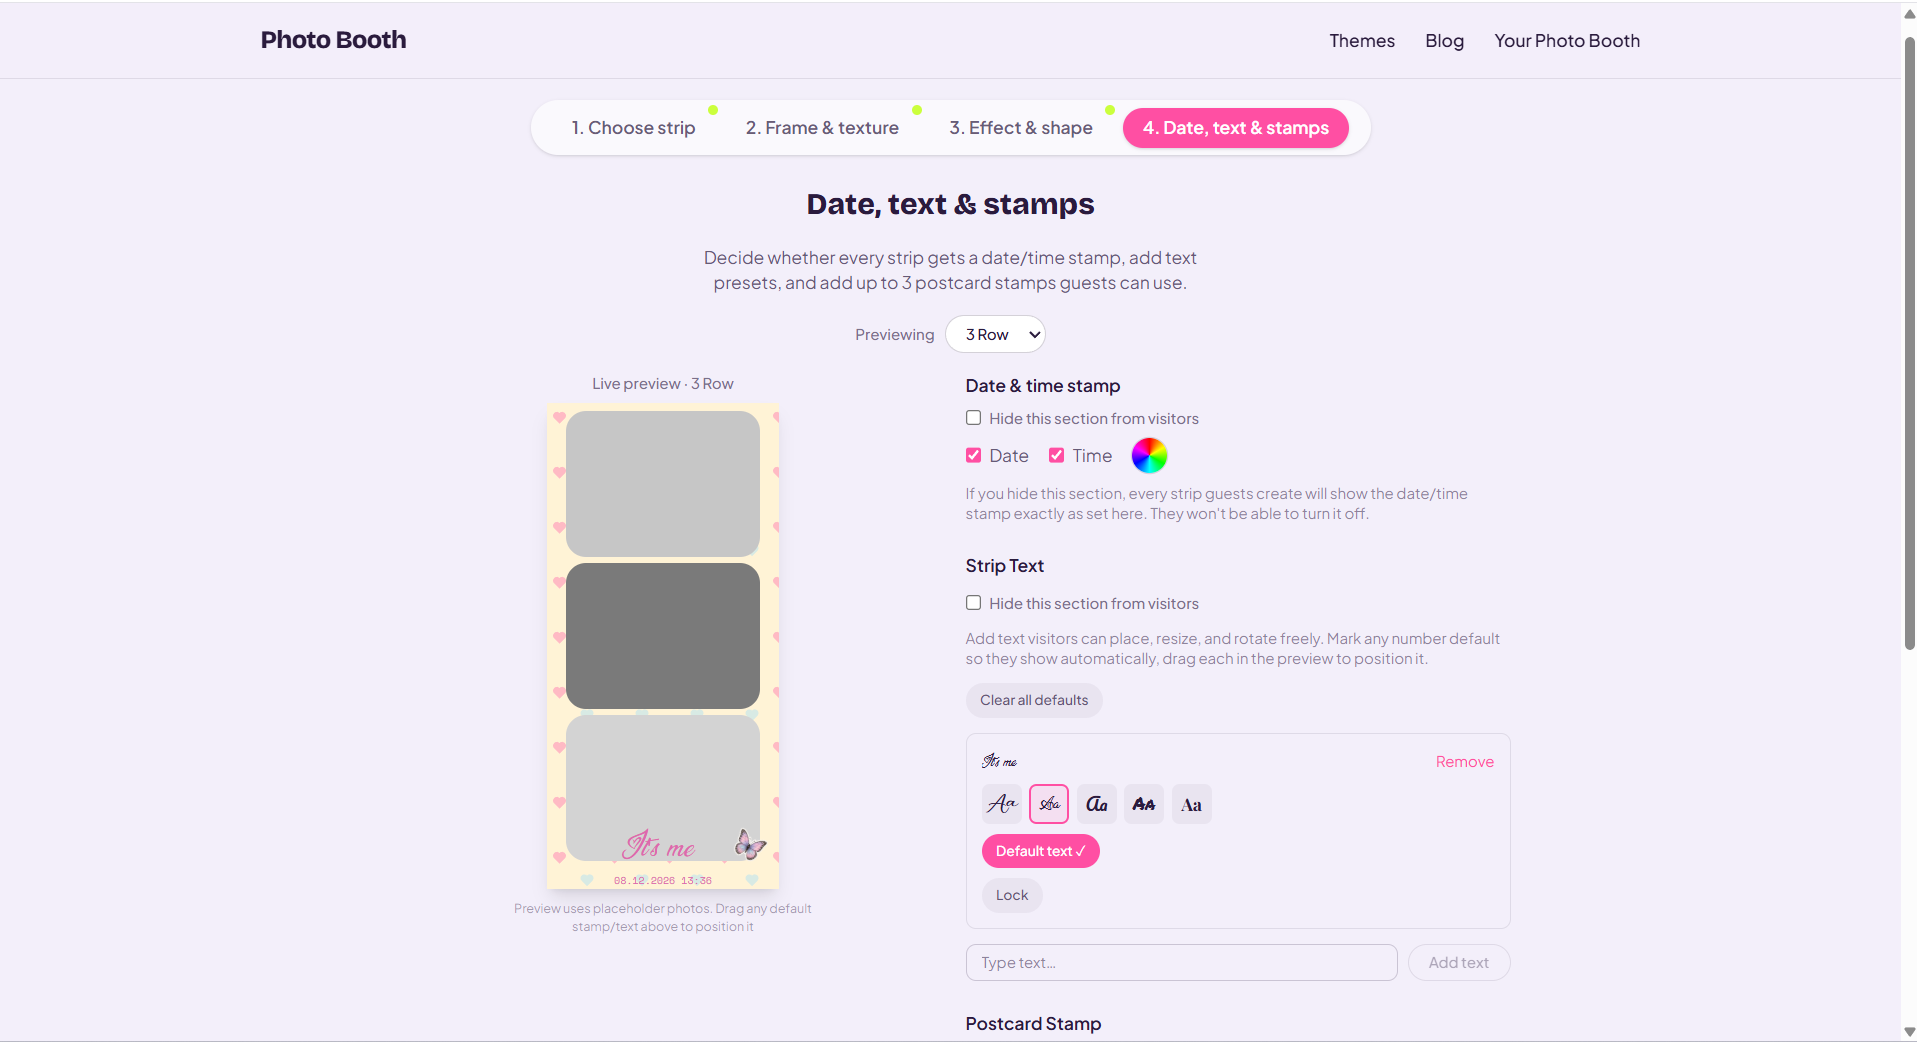
Step 4: Add a Date Stamp, Text, and Postcard Stamps
Turn on a date, a time, both, or neither, in a color of your choice. Add as many text presets as you want — each with its own font — and mark any number as "default" so they show up automatically on every strip. Lock a text preset so guests can see it but not move, resize, or rotate it (perfect for a fixed caption or watermark), and drag defaults exactly where you want them on the live preview.
Postcard stamps work the same way: upload up to 3 images, mark any as default, lock them if needed, and position them precisely. Every section here can be hidden from guests if you'd rather they not touch it.
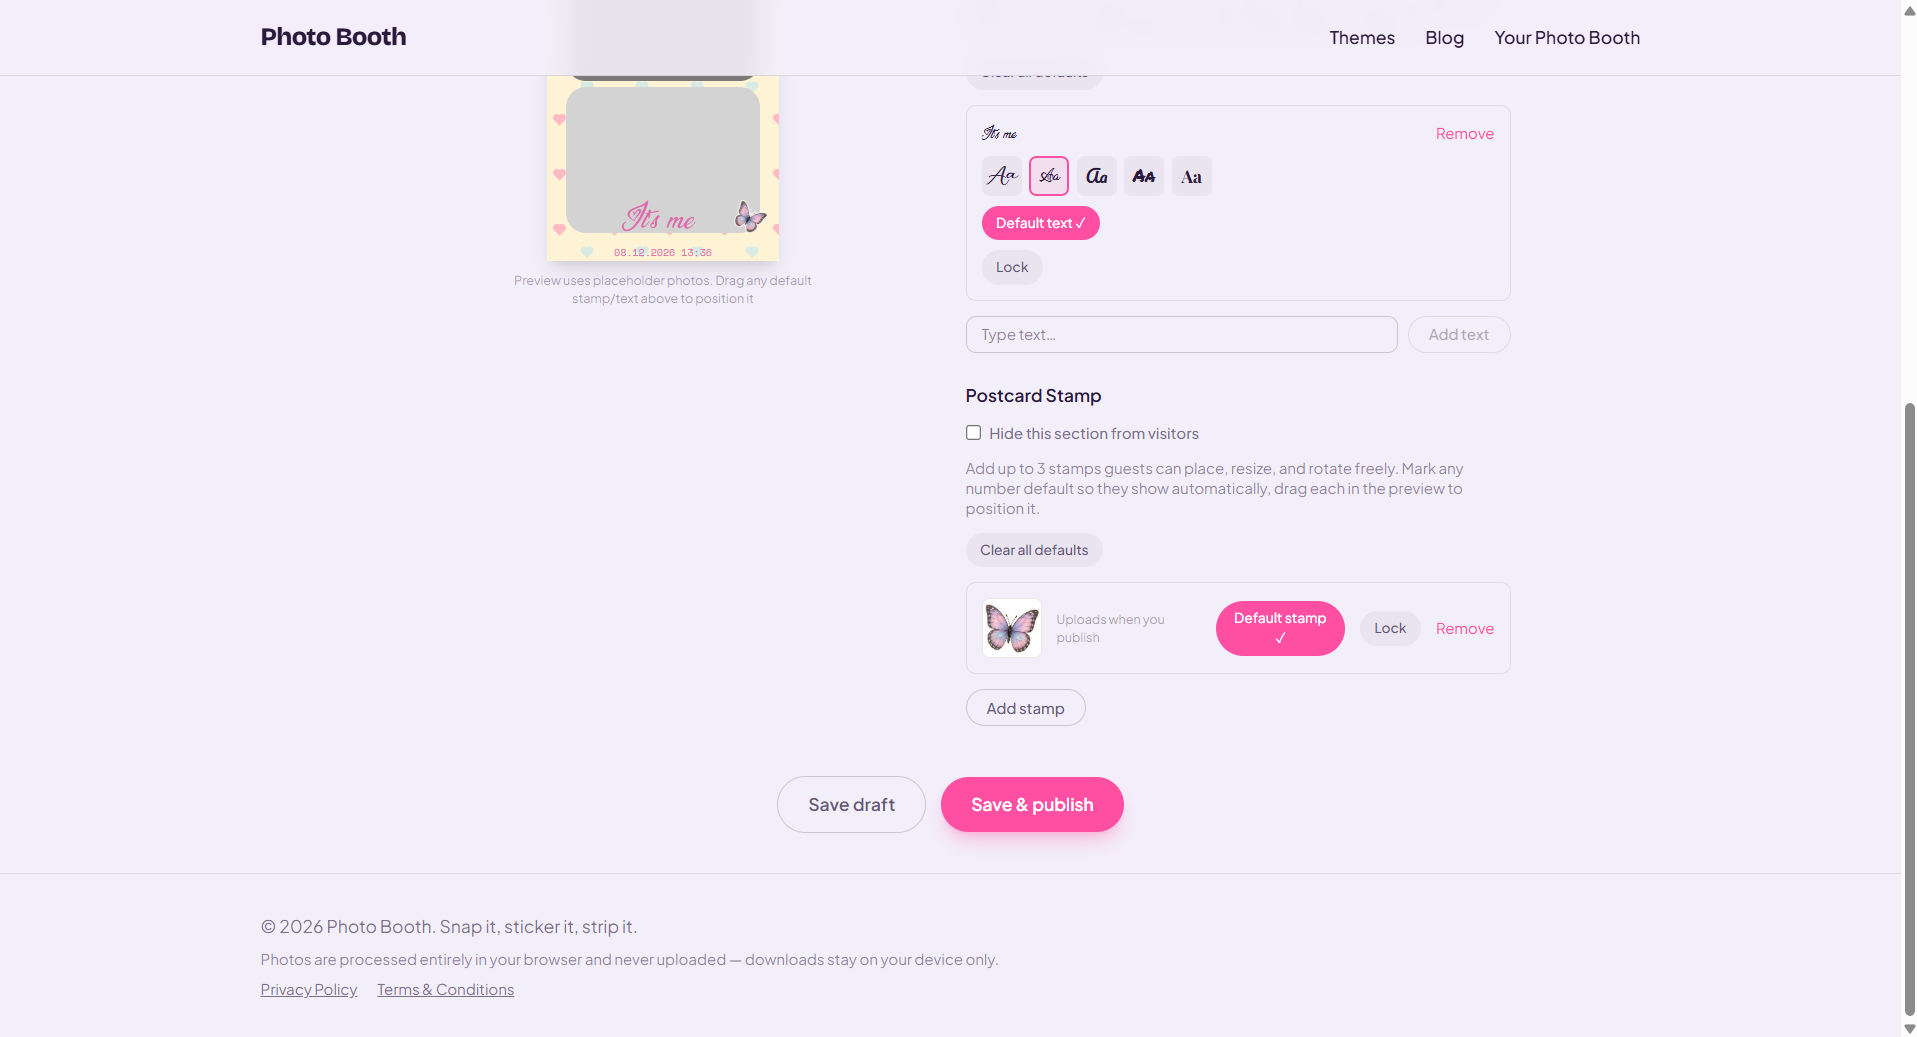
Step 5: Save a Draft or Publish
Progress autosaves as you go, and a "Save draft" button is there for a manual save too. Everything stays local to your device — nothing, including any texture or stamp image you've uploaded, touches the server until you actually publish.
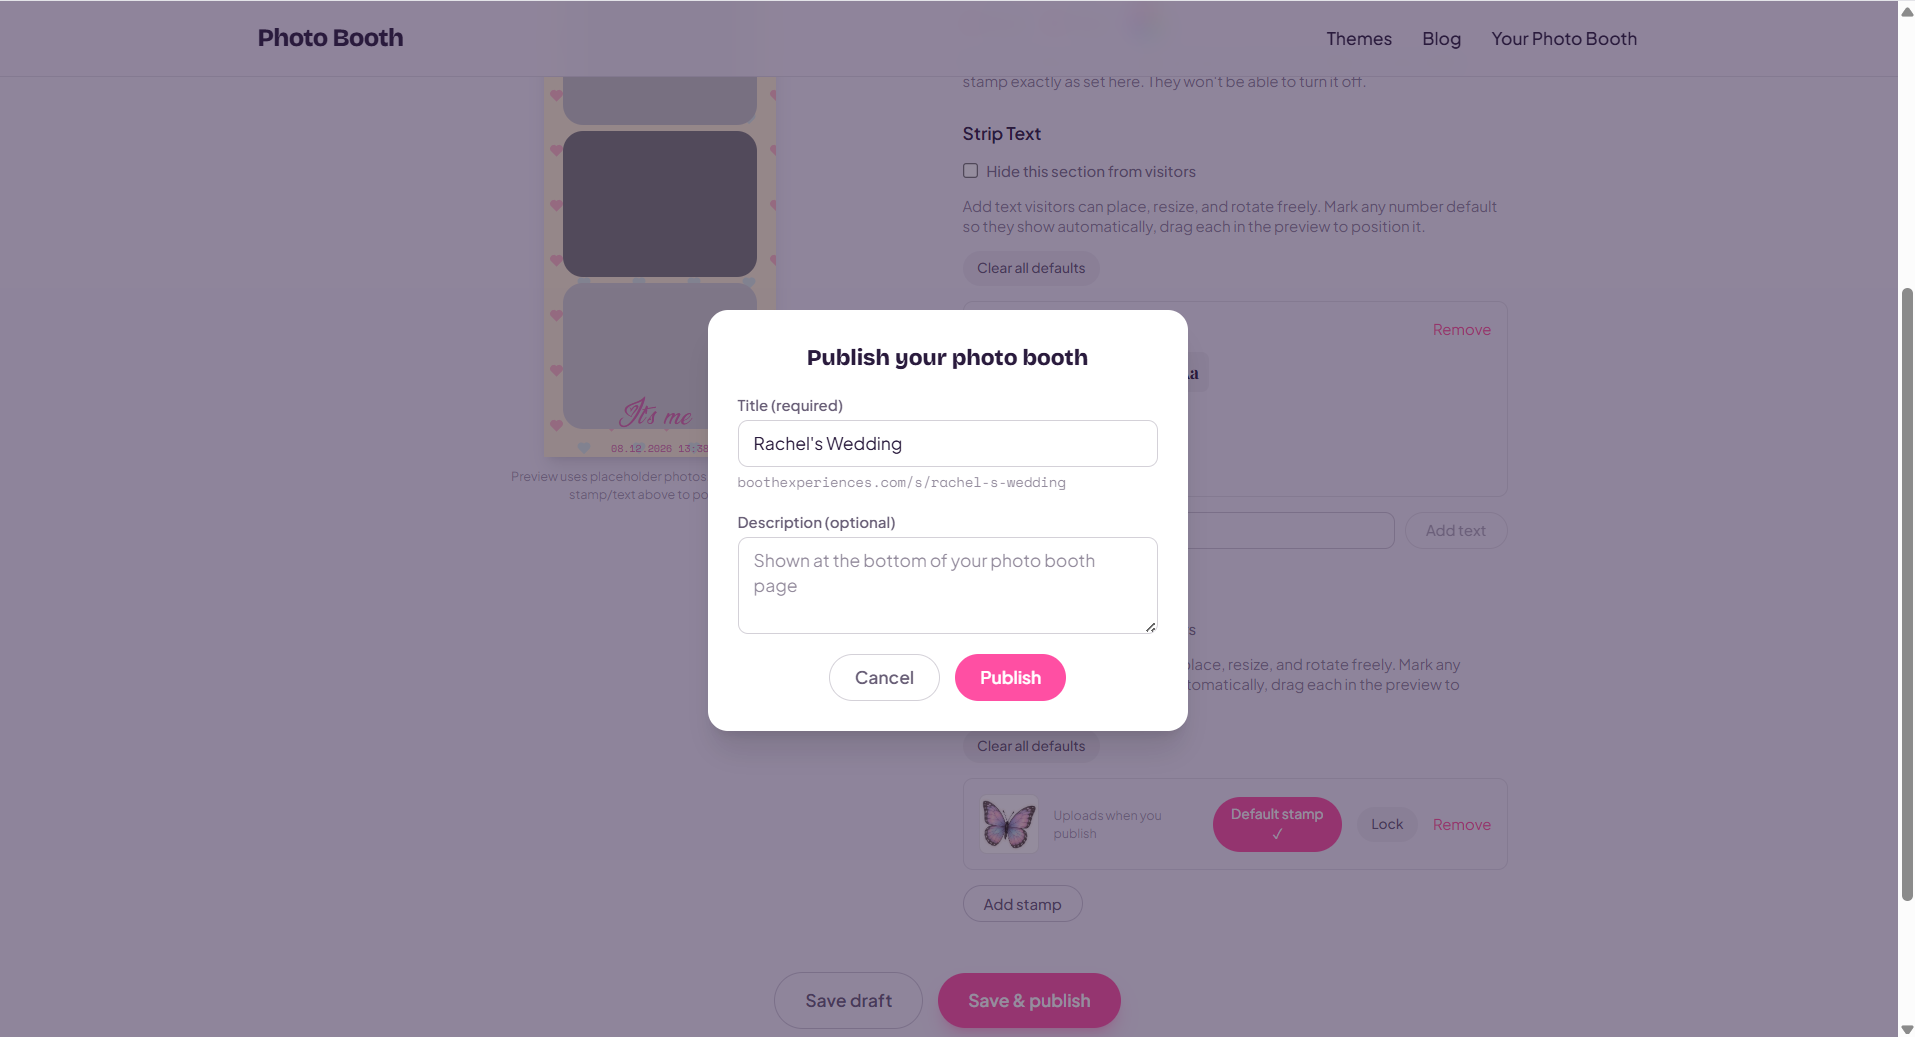
Once at least one layout is selected and every tab has been visited, "Save & Publish" unlocks. It walks you through a quick confirmation, then a title (5+ characters — this becomes your URL, checked for availability as you type) and an optional description, then a success screen with your live link. The format is boothexperiences.com/s/{your-title}. If you go back and edit later, republishing updates that same link — it never creates a duplicate.
Step 6: Share the Link — Here's What Guests Get
Print the QR code on a welcome sign, table card, or poster, or drop the link straight into a group chat, an Instagram story, or the invite itself. Guests just scan or click — nothing to install.
From there they get the platform's full booth experience, styled exactly how you set it up: a layout picker (only if you chose more than one), live camera capture with a countdown and burst mode (or upload instead), optional cropping and retakes, a compose screen that's already pre-styled with your frame, texture, and defaults, and a one-click PNG download. No login for guests either — the whole thing runs in the browser.
Where a DIY Photo Booth Works Best
Photo Booth for a Wedding
Put the link or QR code on the welcome sign, the table cards, or the invite itself. Match the frame color to your wedding palette, add a default stamp or text with your names and the date, and lock it in place so it stays exactly how you designed it, no matter who's holding the phone.
Photo Booth for an Office Party
Skip the IT ticket entirely. Drop the link in Slack or pull it up on a screen at the party — coworkers just click, no install and no signup. A frame color in company colors or a stamp with the team logo makes it feel branded without any extra setup.
Photo Booth for a Birthday
Match the frame and texture to the party theme, add a stamp with the birthday person's name, and share the link in the group chat before everyone arrives so it's ready the second the first guest shows up.
Photo Booth for Any Small Get-Together
Baby showers, graduations, reunions — anywhere a handful of people want a photo strip to remember it by, without renting an actual booth.
6 Tips to Get More Out of Your Photo Booth Link
- Lock anything you don't want changed. A locked text preset or stamp still shows up for every guest — they just can't move, resize, or delete it.
- Set 1–2 defaults before you publish so the very first strip a guest makes already looks finished, not blank.
- Hide sections you want to stay fixed — color, texture, effect, shape, date stamp, text, or stamps can each be hidden from guests individually.
- Size the QR code to be scannable from a few feet away if it's going on a welcome sign or table card, not just a phone screen.
- Test the link yourself on your own phone before the event, the same way a guest would open it.
- Track everything from the "Your Photo Booth" menu in the site navigation — it lists every draft and published creation on your device with a Draft/Live badge, an Edit link, and a Copy URL button. You can create up to 5 per device.
Frequently Asked Questions
How do I make my own photo booth link?
Go to boothexperiences.com/create-photo-booth, click "Let's start," pick a strip layout, style the frame, texture, effect, shape, and any text or stamps, then publish. You'll get a live link at boothexperiences.com/s/your-title in under 2 minutes.
Do guests need to download an app?
No. Guests just open the link or scan the QR code in their phone's camera or browser — nothing to install, and no login needed on their end either.
Is it free to create a photo booth?
Yes. Designing it, publishing it, and guests using it to download their strips is free from start to finish.
Can I use this for a wedding, office party, or birthday?
Yes — it works for any event where guests should walk away with their own photo strip: weddings, office parties, birthdays, baby showers, graduations, and small get-togethers.
Can I edit my photo booth after publishing it?
Yes. Reopen it from the "Your Photo Booth" menu, make changes, and republish — it updates the same live link instead of creating a duplicate page.
Are guests' photos private?
Any texture or stamp image you upload while designing stays local to your device and only reaches the server the moment you publish — not before.
Ready to Build Your Own?
It takes under 2 minutes, it's free to start, and there's nothing for you or your guests to install. Create your own photo booth now and have a shareable link ready before your next event.